
Own Your Shit!
Own Your Shit!
If you've come here from Behind the Zines #16 you can skip to the instructions.
Making zines has always been a radical act.
In 2023, making a website is a radical act too. Let me explain why you should have one and some options for making it happen.
In olden times when we didn’t have shoes or Netflix, we were mostly limited to interacting with the people there in the room with us. Maybe a friend would move away to another city. Boom. Now you had a pen pal (because long distance phone calls were expensive!). Then one day the internet came along and changed everything. It was so exciting because people from all over the world could connect with one another. My first thought was that if only I could somehow make my own website, maybe I could connect with people all over the world too. It was like pen pals but also zines and movies and games and every kind of art combined and supercharged. If you loved art and tech like I did, this was the best thing ever.
One thing I’ve seen over the years is that it’s pretty uncommon to be into both art and technology. As I’ve gotten back into making and reading zines over the last few years I’ve noticed this again. Particularly with the dominance of social media, a lot of people who make zines don’t have websites and most zine activity is happening locked away on Instagram.
There are of course many reasons to not have a website. Two big ones are that they can be expensive (especially if you pay someone to make one for you), and they can be a lot of work to create and maintain. For a lot of people, Instagram, Facebook, or you name it social media app solves this problem. Just tap out a sentence or upload an image and you’re doing it—you’re on the internet connecting with people from all over—all while sitting on the toilet.
So while social media makes some things easy, there are some downsides to relying on it as your only online presence. These issues are all generally related to the fact that these places are owned by corporations whose goal is not to promote you to the world but rather to leverage your content to sell advertising and mine data. So this is why, generally, someone has to have an account to even be able to see your stuff. If they’re not logged in they can’t be shown advertising while their data is mined. And if you do have an account, the system is designed so that you have to log in often and read everything (including a lot of ads and other things you may not be interested in) if you want to make sure not to miss something from your friends. Personally, I’m not interested in doing that or encouraging others to do it.
Relatedly, when someone does a web search for you or your zine, your profile may show up but it will have the social media sites’ branding and it may say a bit about you or maybe it just says how many followers you have.
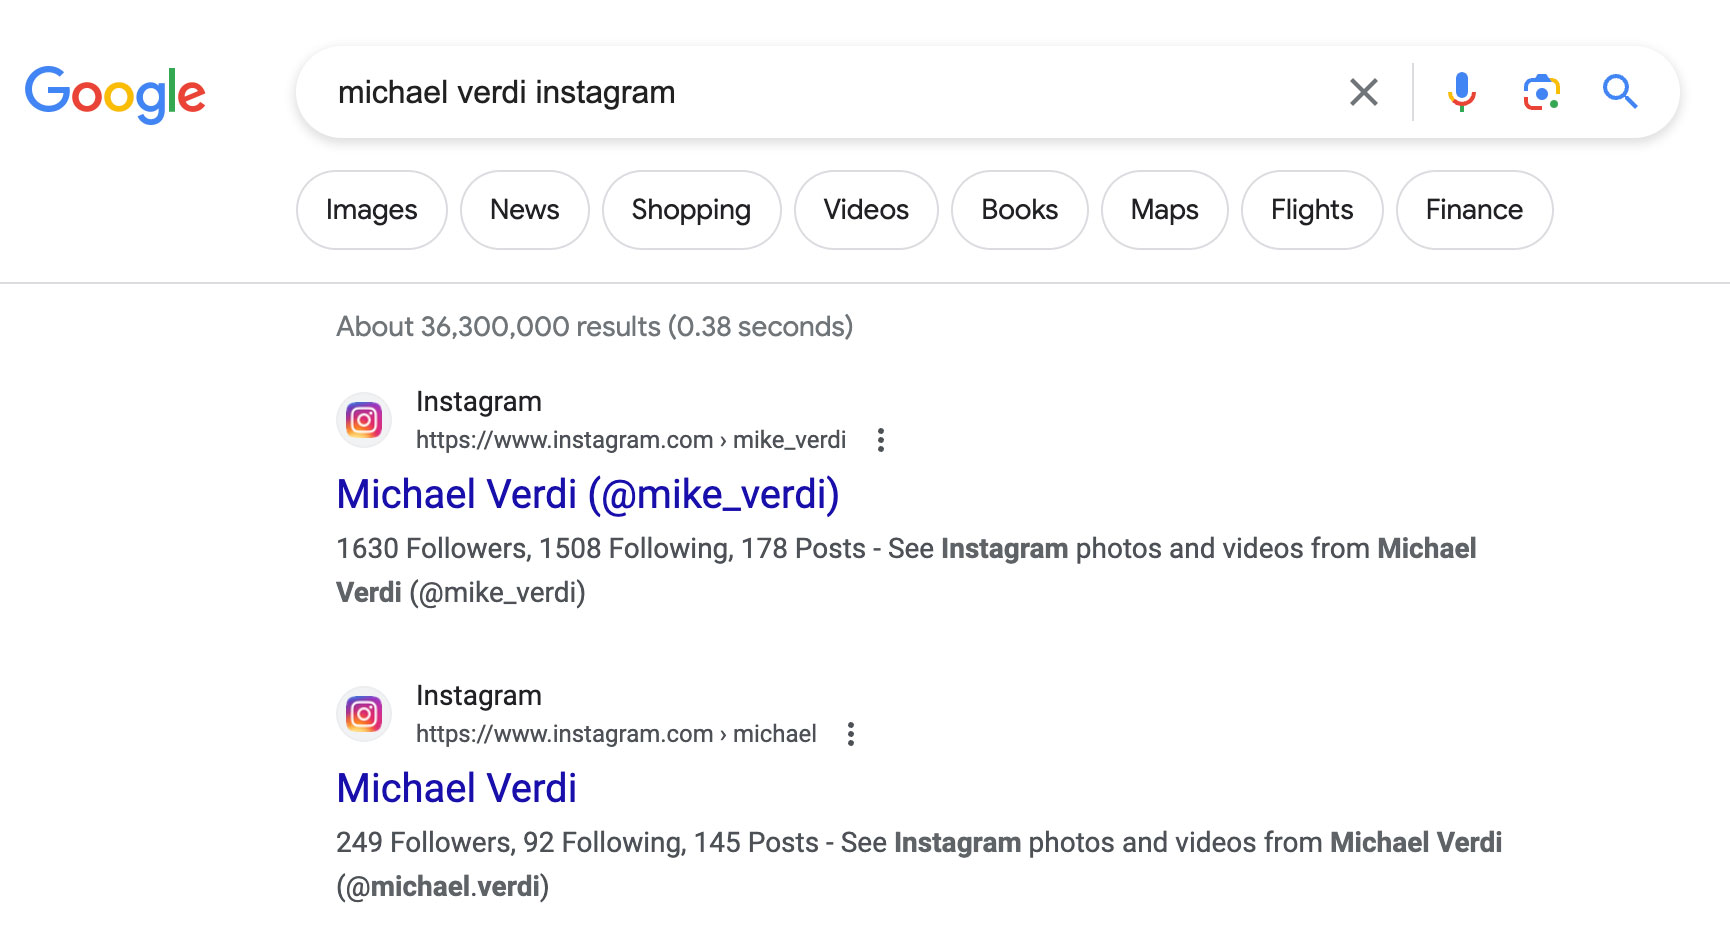
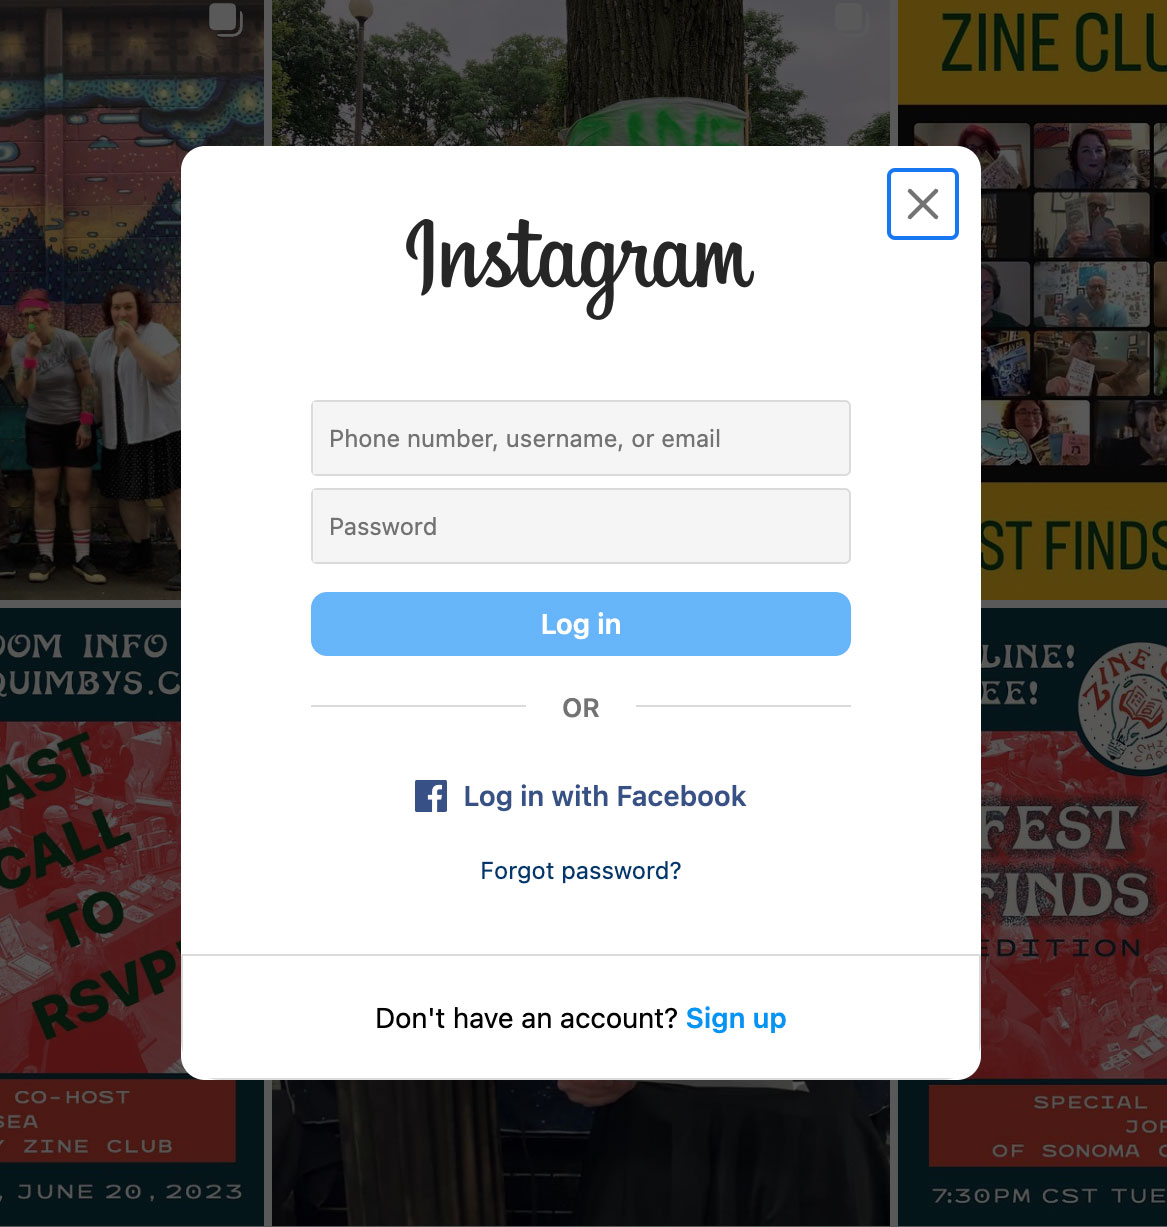
If someone without an account clicks on that link, they might be able to see a few things or they might just be directed to a login page depending on the site.
And while right now things might be fine for you, you don’t own your account. Meta or Google can do whatever they want with it. They can decide what name you are or are not allowed to call yourself (Facebook). They can change the rules about what kind of content is allowed (Tumblr). They can become undesirable places to be (X, née Twitter). They can also shut down and delete everything (Myspace, GeoCities, Google+, Vine, and lots more).
I’m not saying you should quit social media (but, seriously y’all, FUCK INSTAGRAM). I’m saying you should own your own place on the internet. Use social media to help promote your work if you want but don’t make it the only way to represent your work online. It doesn’t have to be fancy—it can just be a list of links (like linktr.ee). It doesn’t have to cost more than about $20 a year. When you have your own site, you now have one address to give out. When someone searches for you, you have control over how you appear so people can find you. And if you ever want to change something or delete everything and start over, you can because it’s yours.
Here are a few options:
- Buy a URL and point it at a free site on blogger.com (about $20/yr). Cheap but not very flexible.
- Set up a website & buy a URL on wordpress.com ($48 the first year, then about $70/yr thereafter). More flexibility than Blogger but still limited.
- Buy a URL and get web hosting for it (about $120/yr). You can build your own website or have the hosting company install WordPress. You can do just about anything (but that can get complicated).
- Get real fancy and use Wix or Squarespace (about $200/yr). Less flexible than building something from scratch or customizing WordPress but Wix and Squarespace make it easy to make a beautiful website.
A nice thing about buying a URL is that you can start small by pointing it to a free website and seeing if that works for you. Then later, you take that URL (because you own it) to Wordpress.com or Squarespace or wherever. Ready to give it a try?
How to set up your website
Alright, let's go. As I laid out earlier, you've got a few options:
- Buy a URL and point it at a free site on blogger.com
- Set up a website & buy a URL on wordpress.com
- Buy a URL and get web hosting for it (use WordPress or code your own site).
- Get real fancy and use Wix or Squarespace.
The first option is pretty easy and it's much cheaper so I'm going to focus on that. You can always move to another option in the future if you outgrow this one. If you use Wordpress, Wix, or Squarespace they will hold your hand through the whole process. But no matter which option you choose, I've got some info about buying a URL and some tips on setting up a store that could save you some money.
This may look like way too much information but getting a URL, setting up a website on Blogger and connecting them only takes about an hour or two. You don't even have to do it all at once. Getting the URL is a standalone task and connecting it to Blogger is another. Setting up your website on Blogger can be spread out over as many times/days as you want.
Buying a URL
The first step in owning your shit is to buy the address where everyone can find you. You buy this address (or URL) through a registrar. There are many registrars out there. Most of common types of URLs like those ending in .com, .org, .net can be gotten from most any registrar. Sometimes the newer or more fanciful URLs, like .mov or .fan for instance, can only be had at a few registrars. And some URLs, like .pharmacy, have special requirements that you have to meet in order to purchase them.
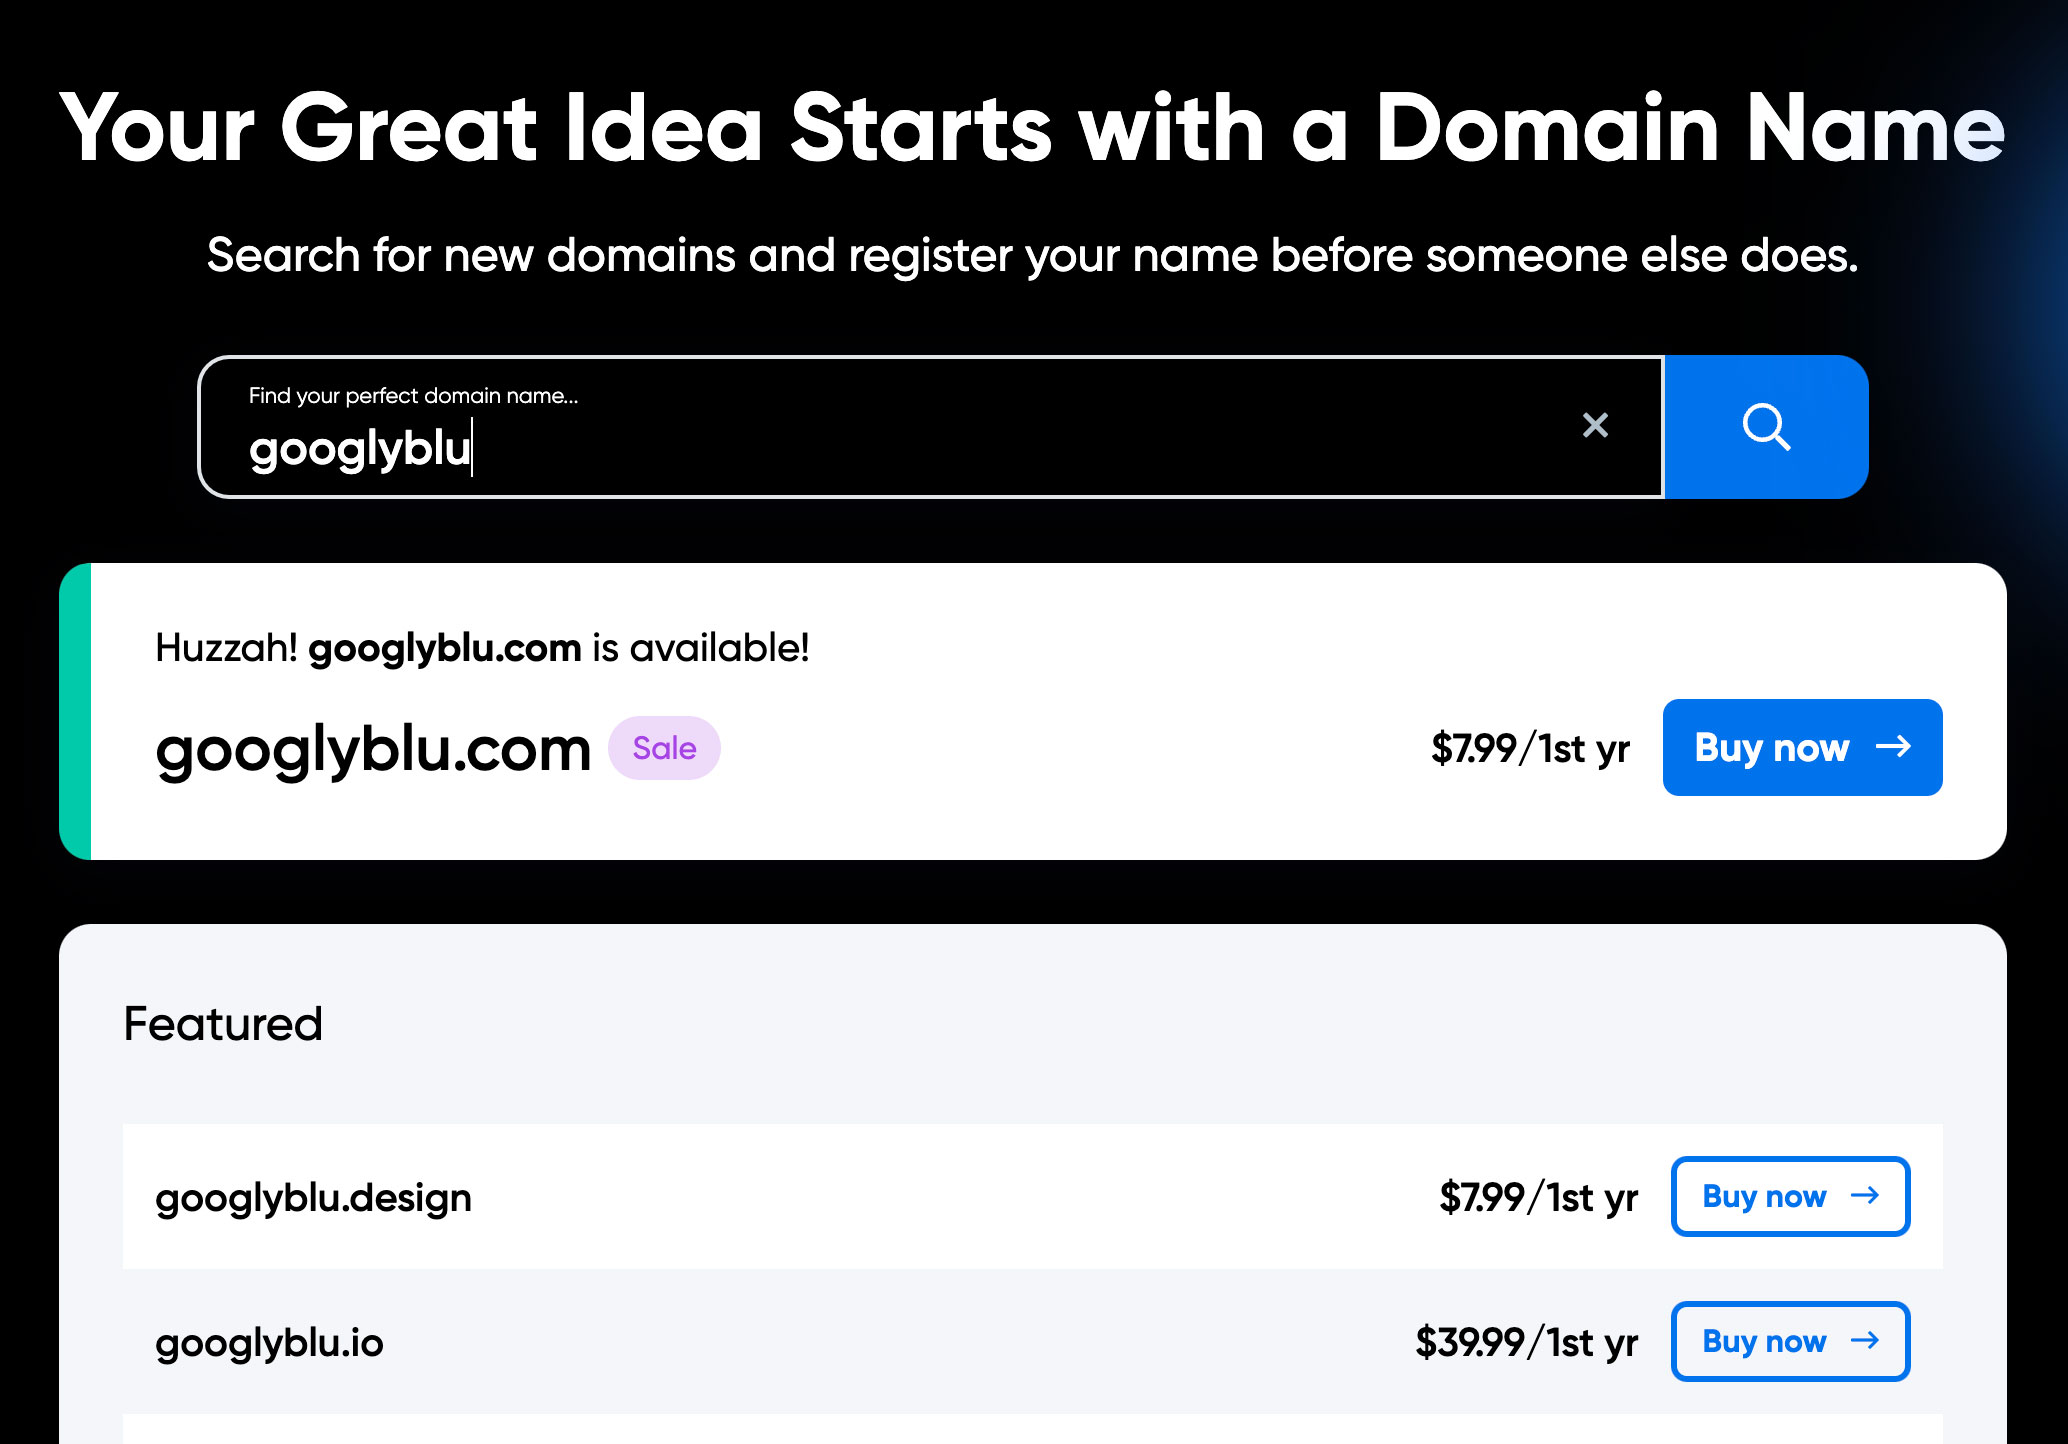
My suggestion is to go to Dreamhost, find the search box on the front page and type in a name you're interested in. Occasionally I have an idea for a URL that Dreamhost can't register (zine.fan for example), when then happens I go Namecheap.
The big thing to know is that you don't need to add webhosting or an SSL certificate (gives you the lock in the address bar) at this point. All you need to do is buy the URL. We'll handle the rest later.
More things about URLs
- "englishword.com" is already taken. What I mean is any word in the English dictionary with a .com after it has already been purchased. This is why companies often come up with names that are misspellings (Flickr, Tumblr, Letterboxd ) or made up (Etsy, Skype, Zillow, googlyblu). The good news is that a few years ago, ICANN created a bunch of new TLDs (the things at the end of a URL - like .com). This is how I was able to get URLs like zine.party and zine.camp.
- Buying a URL is a misnomer. It's really a yearly rental plan. The price will differ from registrar to registrar and will be different for different types of domains. In general, one that hasn't been registered before (a new URL) is about $20/yr. There are some that can cost more though, like $40 or $50/yr. Often registrars will have sales or offer an introductory price. So you might be able to buy one for $5 for the first year. Just be sure to check the "renewal" price before you buy so you're not surprised.
- Buying a URL doesn't give you a website. When you buy a domain from a registrar, you now control that address but that doesn't put a website at that address. To get a website there you have to either also purchase some kind of webhosting (space on a webserver to put the files for your website) or you have to connect your URL to an existing website, like a free Blogger blog.
- Once you get a URL it can take 24 - 48 hrs for it to be available on the internet. This is also true when you move it from one company to another or point from one website to another. It might happen faster for you but it still might not be available from everywhere in the world yet. The reason is complicated. You can read more about it here.
- If possible, choose to have your URL payment auto-renew every year. If you forget to pay for it, it will probably get bought by someone else. This happened to the state of Maryland. I wonder how much they had to pay to get it back.
Create a website on Blogger
Now it's time to set up the website part of this project. Later we'll connect the URL and the website. Go to Blogger and click the "Create your blog" button in the middle. They'll have you log in with your Google account (or create one if you don't have one) and then you'll pick a name and address for your blog. Don't waste a bunch of time figuring these out—we're not going to use them (they can also be changed later).
You can, of course, use Blogger as a blog—the way it's designed. Larry Wolf does this and it works well for him. But if you don't want to maintain a blog and just want a simple page that links to your stuff then watch this video.
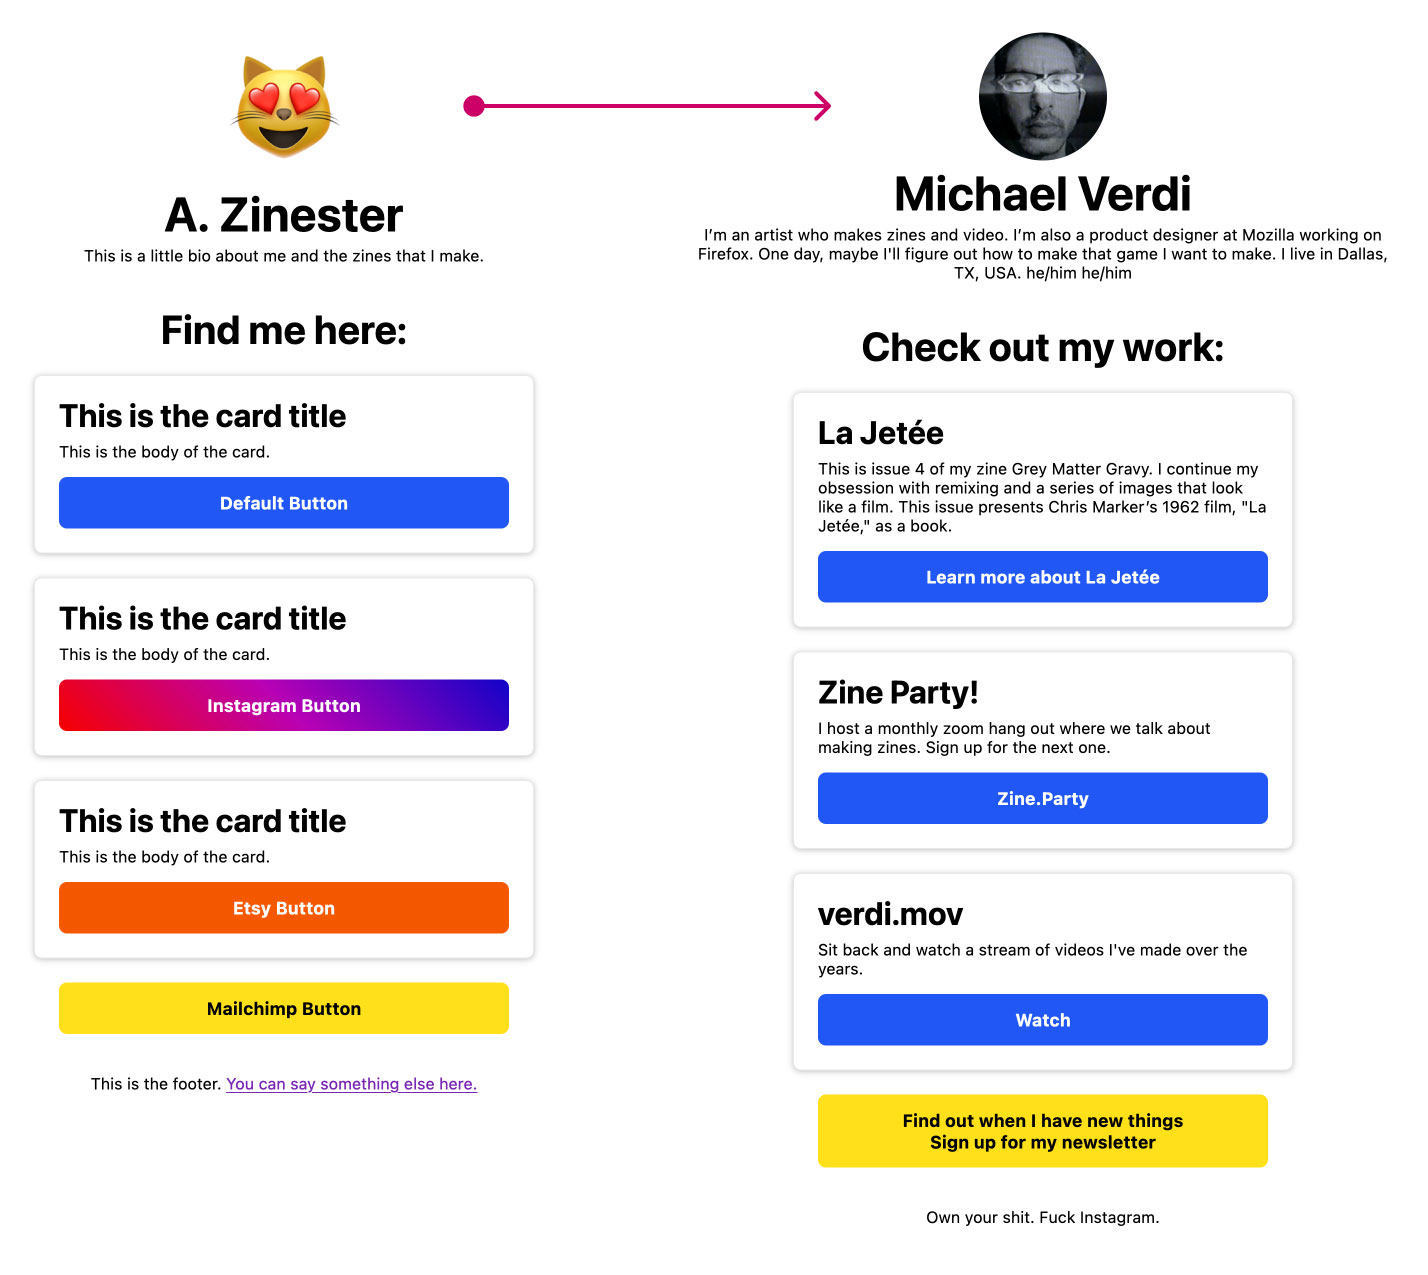
I'll take you through customizing this template and adding it to Blogger.
Connecting your URL to Blogger
The last part of this is making your URL take you to the website you set up on Blogger. I have one set up as an example. If you go to x627.com you'll see the template that I customized in the video above. This is hosted on Blogger.
Google has a support article for this process but honestly I found it a bit confusing so I'll help you through it.
- Go to your Blogger dashboard. Look for "Settings" and "Custom domain."
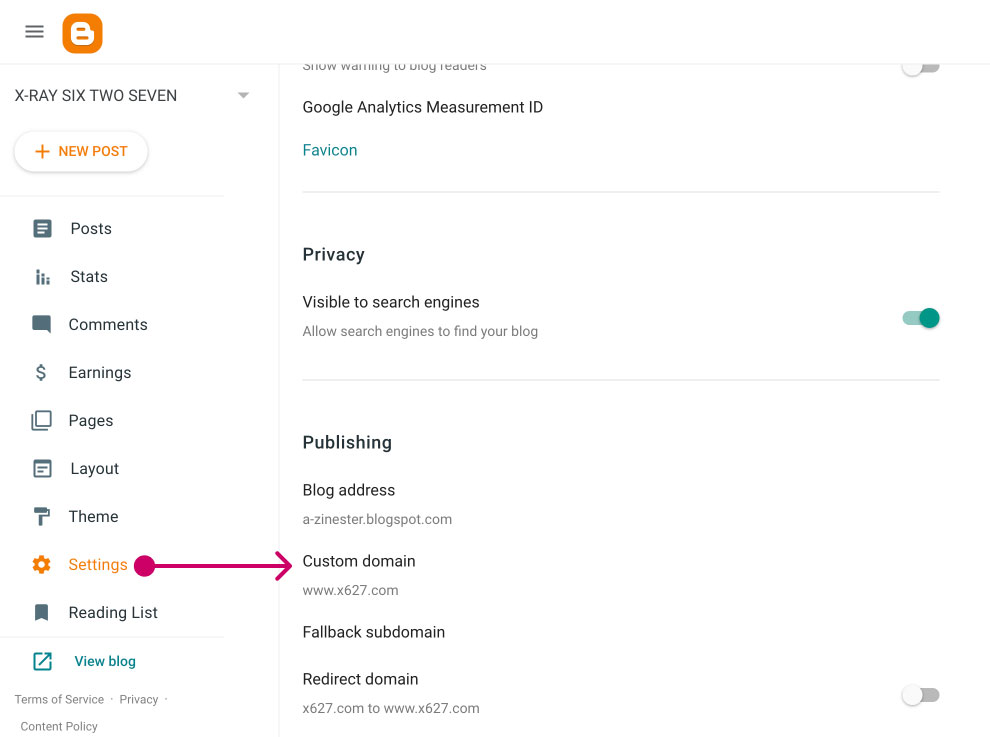
- Click on Custom domain and enter your URL as simply "www.yoururl.com" don't add http:// or https://.
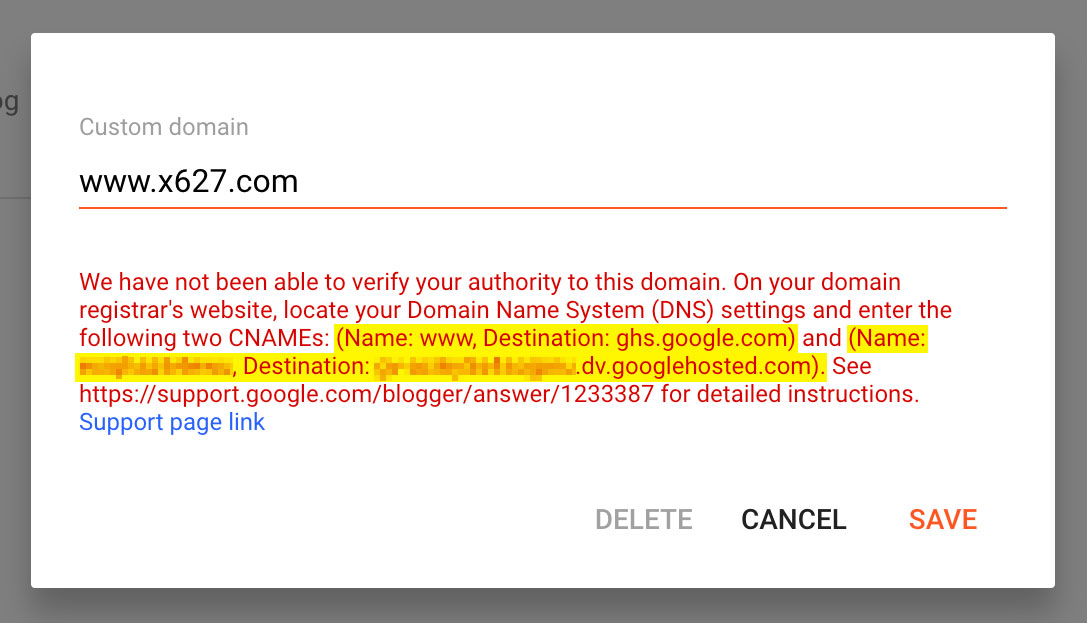
- Then click Save. You will get an error but that's ok - you need this error. Notice that in the text of the error they give you two bits of instructions. You'll need to add two CNAMEs to your DNS settings (don't worry I'll show you). Then they list the CNAMEs:
- Name: www, Destination: ghs.google.com
- Name: random-stuff, Destination: random-stuff.dv.googlehosted.com
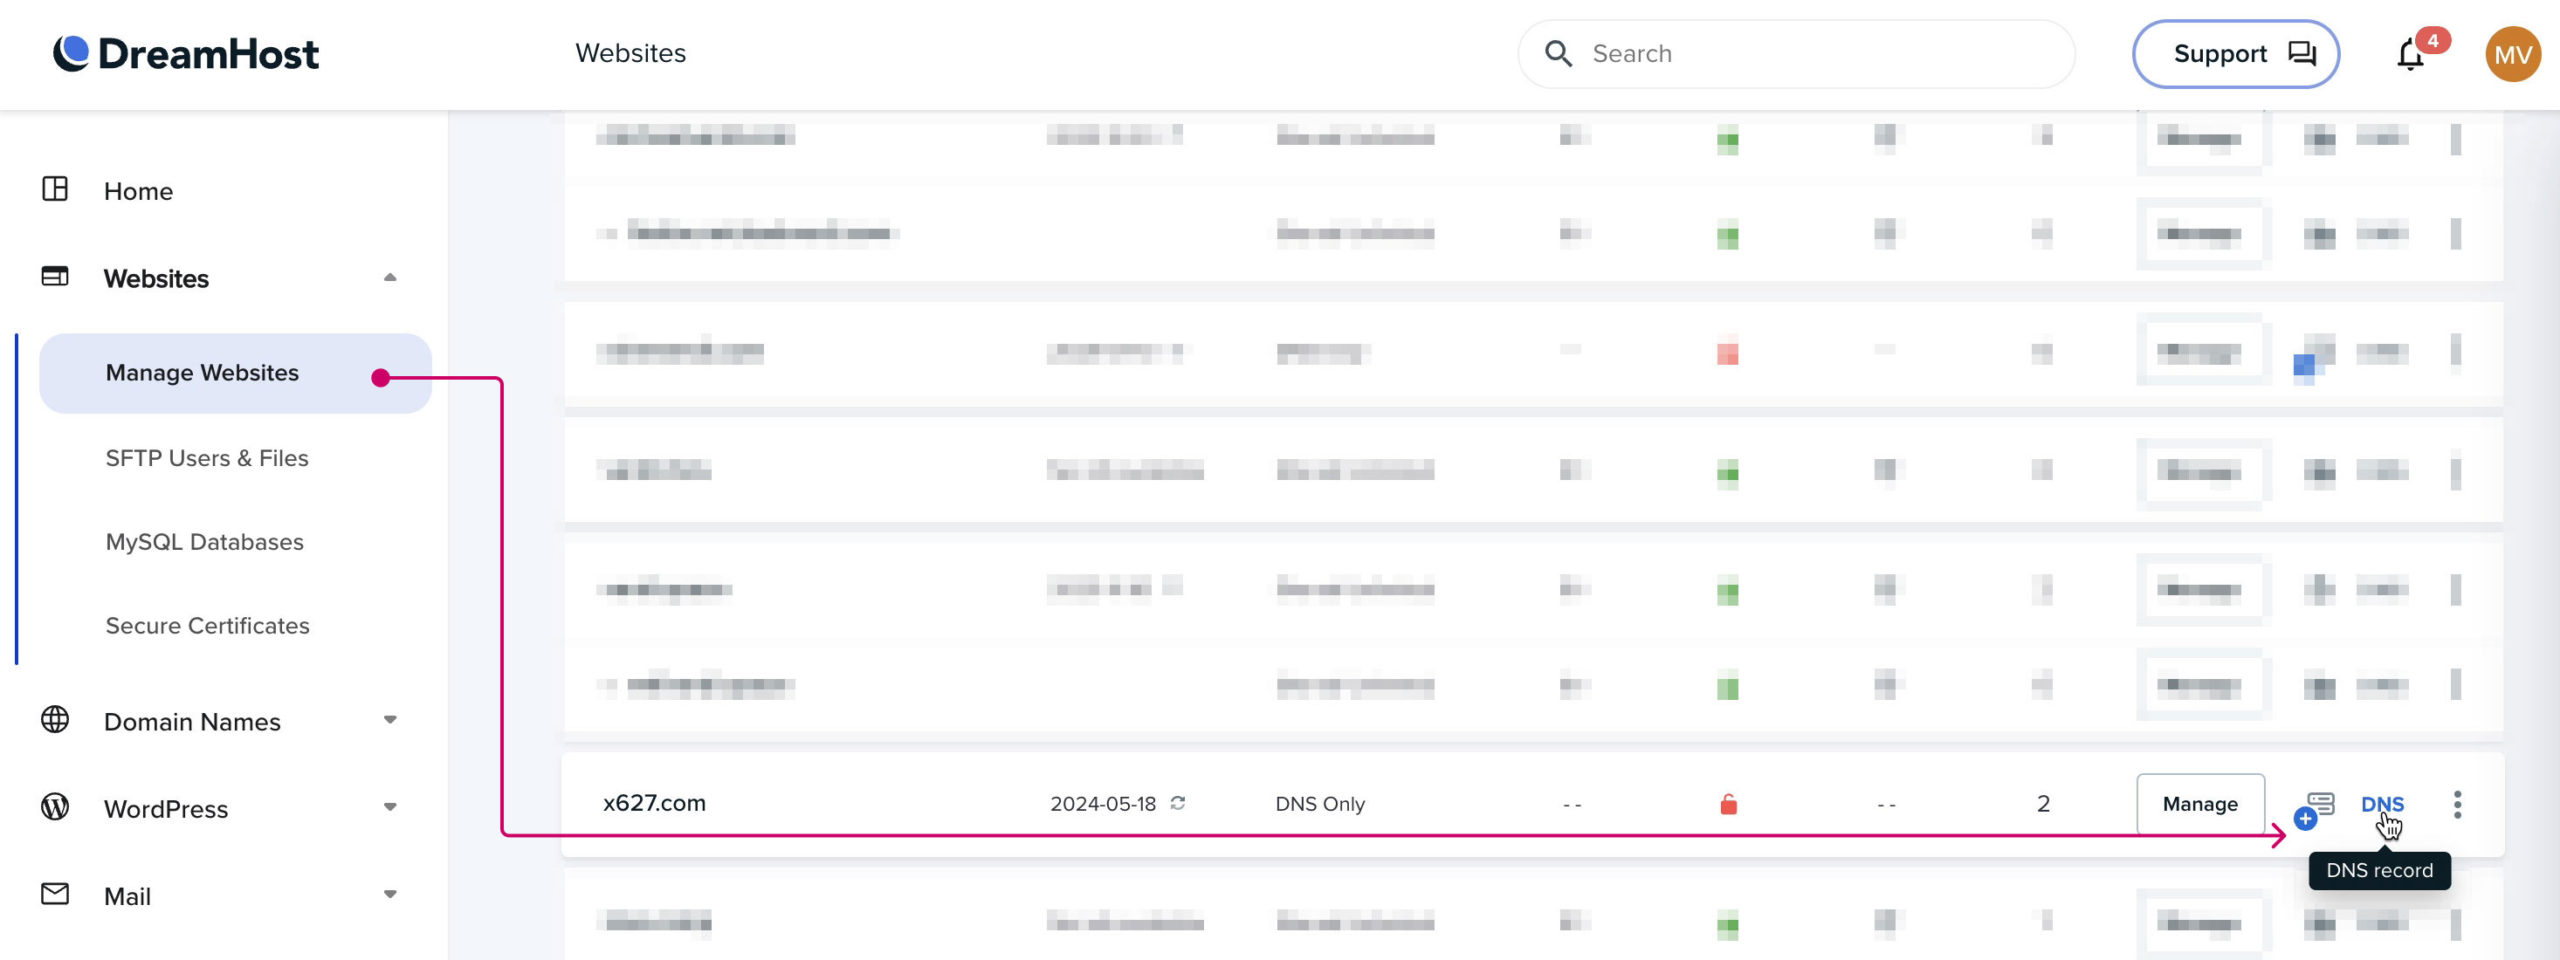
- Now you need to go Dreamhost (or wherever you got your URL) and find the DNS settings for your URL. In the Dreamhost dashboard, go to Manage Websites and then locate the DNS button for your URL.
- Clicking that DNS button will bring you to the DNS settings. There you will create two new CNAMEs like the error message said to do. For Dreamhost, click on "Add Record" and then add a CNAME. It will give you two boxes to fill out: "Host" and "Points to". Here you past in the "Name" and "Destination" values from the error message on Blogger. The "Name" goes in "Host" and "Destination" goes in "Points to".
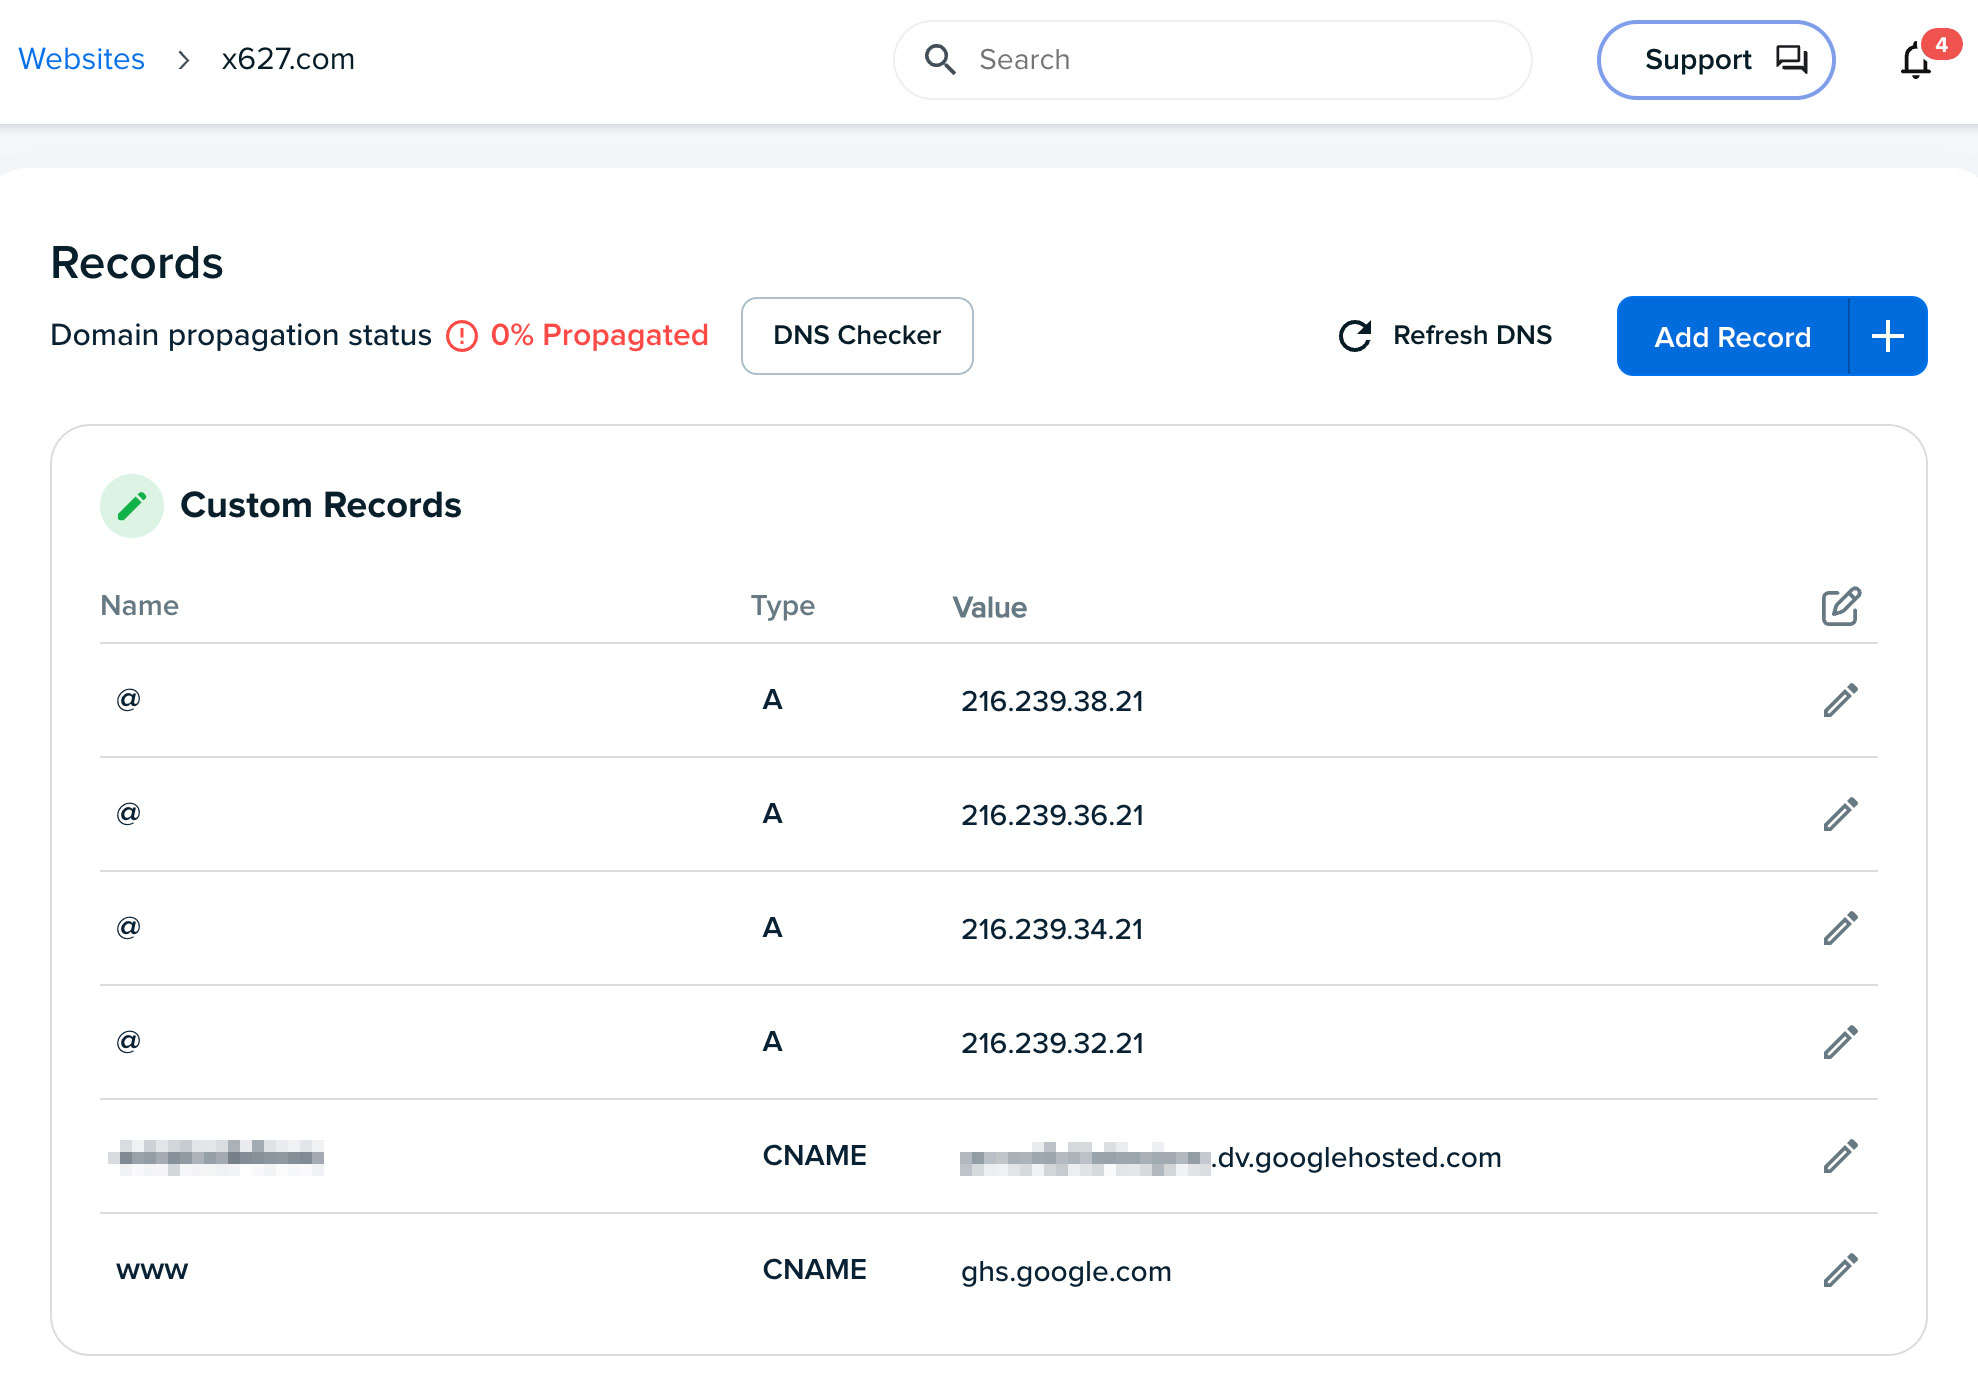
- Before you leave the DNS settings we need to create some more records. This time you need to create 4 "A" records. In each one you will leave the "Host" value blank and in the "Destination" box you will put in these IP numbers (one sequence of number for each record).
- 216.239.32.21
- 216.239.34.21
- 216.239.36.21
- 216.239.38.21
- When you're done, your DNS settings should have custom records that look something like this:
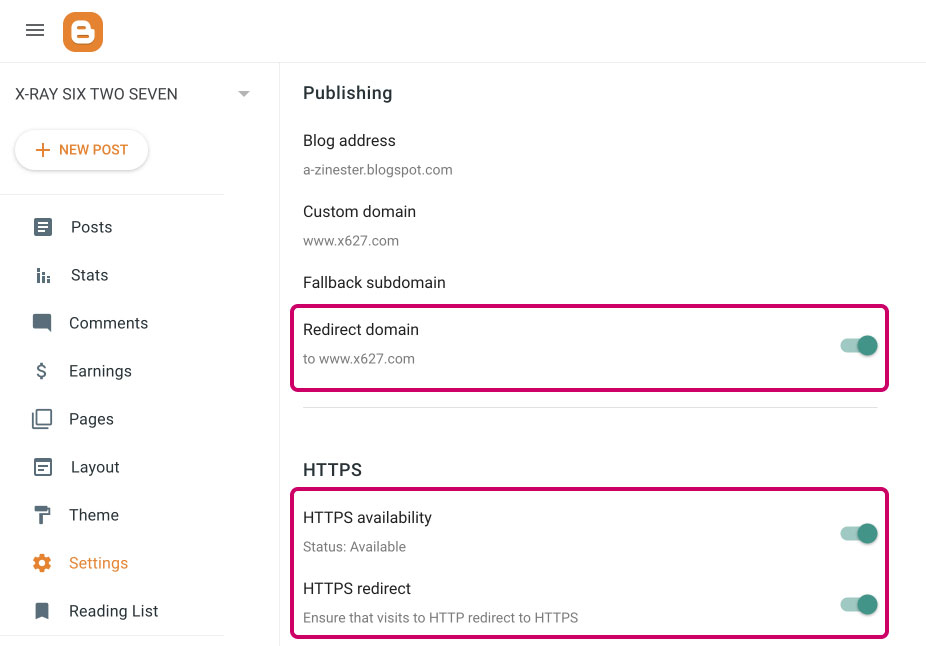
- Finally, go back to Blogger and look in settings for "Redirect domain" and "HTTPS" settings. Toggle on Redirect domain, HTTPS availability, and HTTPS redirect.
And that's it. You're done! It may take a day or two for the internet to update these changes everywhere. But once that happens everyone can find all of your shit in one place that you control.
Check out my completed example at x627.com
What about the other options?
Wordpress.com, Squarespace.com and Wix.com will all hold your hand through setting up an account, buying a URL (or moving the one you have) and creating a website. They are all significantly more expensive than going the Blogger route ($70 - $200/yr vs. $20/yr) but you can make a beautiful website without coding anything. Whether that's worth it or not is up to you. My advice is to try using Blogger and see how you like it. You can always switch later.
Ecommerce
One thing to be aware of is that they will all offer you lots of ecommerce functionality if you upgrade. Unless you are selling A LOT of things and trying to manage an inventory system, you probably don't need this. The simplest (and cost effective) way to sell things on your website is to create an account at Stripe.com. There you can set up a product and generate a link or button that you can use on your website. You can also get QR codes that are handy for in-person events.
Examples (real links to buy my zine):

It's also way cheaper than using Etsy. Right now (Aug 2023) Etsy charges:
- $.20 to list
- 6.5% transaction fee
- 3% + $.25 payment processing
If you sell something for $5, Etsy gets $.93.
Stripe on the other hand only charges 2.9% + $.30 for each thing you sell. That comes to $.45 on a $5 item or less than half the cost.
The complete DIY option
The last option is to add your own webhosting to your URL. Dreamhost is one of many places that can do that for you. This the option that I use. The main advantage of this approach is that you can code just about anything you want or you install Wordpress without any of the restrictions that Wordpress.com has. So you can build whatever you want, use whatever theme you want and all the plugins you want. The downside is that you're basically on your own. Google becomes your tech support.
Let me know what you make
I hope you found this useful. Let me know where to find you on the web.
Good luck!